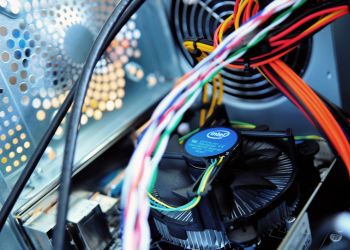
In this article, we will dive into the world of CPU cooler installation and explore the importance of proper mounting.
We’ll discuss the necessary tools and information you need, as well as common issues that arise from improper CPU cooler installation.
By the end, you’ll have a clear understanding of how to ensure your CPU cooler is mounted properly and how to troubleshoot any potential problems.
Gather Necessary Tools and Information

Before diving into the installation process, it’s crucial to gather the necessary tools and information. Check your CPU cooler’s manual for specific requirements and instructions.
Generally, you’ll need a screwdriver, thermal paste, and rubbing alcohol for cleaning the CPU surface.
Importance of Proper CPU Cooler Mounting
Proper CPU cooler mounting is essential for optimal performance and longevity of your processor.
A correctly mounted cooler ensures efficient heat dissipation, which prevents overheating and potential damage to your CPU. Additionally, it helps maintain consistent performance and extends the overall lifespan of your computer.
Common Issues with Improper CPU Cooler Installation
Improper CPU cooler installation can lead to various problems, such as inadequate cooling, thermal throttling, and even system crashes.
The most common issues stem from insufficient contact between the CPU and the cooler, uneven pressure distribution, or incorrect application of thermal interface material (TIM).
Preparing the Workstation
Before diving into the installation process, ensure you have a clean and clutter-free workstation.
Working on a stable and static-free surface will prevent accidental damage to delicate components during the installation process.
Related Article: How to Check CPU Cooler Compatibility: A Step-by-Step Guide
Understanding CPU Cooler Installation Basics

Different CPU coolers may have varying installation methods.
Familiarize yourself with the basics, such as the orientation of the cooler, which direction the fan should face, and the required mounting brackets.
Verifying CPU Cooler Compatibility
Make sure your CPU cooler is compatible with your motherboard and CPU socket type.
Check the cooler’s product page or manual to confirm compatibility. Using an incompatible cooler could lead to severe issues and might even damage your hardware.
Checking for Proper Mounting Pressure
Applying the right amount of mounting pressure is crucial for optimal heat transfer between the CPU and the cooler.
Too little pressure may result in poor contact, while excessive pressure can damage the CPU or the cooler. Follow the manufacturer’s guidelines to achieve the correct mounting pressure.
Inspecting Thermal Interface Material (TIM) Application
The thermal interface material (TIM), usually thermal paste, fills microscopic gaps between the CPU and cooler, enhancing heat transfer.
Ensure you apply an appropriate amount of thermal paste, as using too little or too much can lead to inefficient cooling.
Related Article: How To Check CPU Cooler is Working: A Comprehensive Guide
Checking for Mounting Bracket Tightness
Double-check the tightness of the mounting brackets. Loose brackets can cause the cooler to shift during operation, resulting in poor contact and compromised cooling performance.
Confirming Fan and Cable Placement
Ensure that the CPU cooler’s fan is correctly installed and connected to the motherboard’s CPU fan header. Verify that the cables are neatly routed and not obstructing other components.
Monitoring CPU Temperatures
Once the cooler is installed, it’s essential to monitor CPU temperatures regularly.
You can use various software tools to check temperature readings and ensure they stay within safe operating limits.
Stress Testing the CPU
Stress testing the CPU pushes it to its limits and helps you identify any potential overheating issues.
Several stress-testing applications are available that can help you evaluate the stability and temperature performance of your CPU.
Troubleshooting Common Issues
If you encounter any cooling-related issues after installation, don’t panic.
Go back through the steps and verify each one. Check for proper mounting pressure, thermal paste application, and fan functionality. Often, reseating the CPU cooler can resolve many problems.
Reinstalling the CPU Cooler (if necessary)
If you discover that the CPU cooler was not correctly mounted, don’t hesitate to reinstall it. Taking the time to do it correctly ensures your system’s long-term health and performance.
Post-Installation Maintenance
Regular maintenance is vital to ensure your CPU cooler continues to perform optimally.
Check for dust buildup on the cooler and fan regularly, as it can impede airflow and cooling efficiency. Clean the cooler and fan using compressed air or a soft brush to prevent dust-related issues.
FAQs About How To Check If CPU Cooler Is Mounted Properly
What is the correct way to mount a CPU cooler?
To correctly mount a CPU cooler, first, clean the CPU and cooler base with isopropyl alcohol. Apply a small amount of thermal paste on the CPU.
Then, align the cooler evenly on the CPU and fasten it using appropriate screws or brackets following the manufacturer’s guidelines.
How tight should you mount CPU cooler?
It is essential to achieve the right balance when mounting a CPU cooler. Avoid overtightening, as it may damage the CPU or cooler.
Tighten the screws until they are snug and secure, but not excessively, to ensure even pressure distribution.
Is the CPU cooler supposed to wiggle?
A slight wiggle or movement is normal after mounting a CPU cooler. However, excessive or loose movement indicates an incorrect installation.
Double-check the mounting, ensuring all screws are properly tightened to ensure optimal contact between the CPU and cooler.
Can you overtighten the heatsink?
Yes, overtightening the heatsink can be problematic. Applying too much pressure can lead to uneven contact between the CPU and cooler, resulting in poor heat dissipation.
Always tighten the screws to the recommended torque specified in the cooler’s manual.
Where is the best location for CPU cooler?
The best location for the CPU cooler depends on your computer’s case and airflow configuration.
Generally, it’s recommended to place the cooler towards the rear exhaust fan or top of the case to ensure efficient heat dissipation.
What is the best placement for a cooler?
For air coolers, the best placement is with the fan facing towards the rear exhaust fan of the case.
For liquid coolers, the radiator should be mounted at the top or front of the case to take advantage of the cool air coming from the outside.
Where is the best CPU cooler placement?
Optimally, the best CPU cooler placement would be at the top of the case as a top-mounted cooler can utilize rising warm air for cooling.
Alternatively, rear placement is also effective as it aligns with the case’s exhaust fan.
Does thermal paste expire?
Yes, thermal paste can expire. Typically, its shelf life ranges from 2 to 3 years. Expired thermal paste may not perform optimally, leading to reduced heat transfer. It’s best to use fresh thermal paste to ensure efficient cooling.
Is a thicker heatsink better?
In most cases, a thicker heatsink tends to have better heat dissipation capabilities. However, other factors like material, surface area, and fan quality also play a vital role.
It’s essential to consider the overall design and performance of the heatsink rather than just its thickness.
Is it okay if thermal paste overflows?
While a small amount of thermal paste overflowing around the CPU is generally not an issue, excessive spillage can create a mess and may even cause short circuits.
It’s recommended to apply an appropriate amount, roughly the size of a pea, to avoid any unnecessary spillage.
Final Thoughts About How To Check If CPU Cooler Is Mounted Properly
Ensuring your CPU cooler is mounted properly is critical for maintaining a healthy and high-performing computer system. By following the steps outlined in this article, you can avoid common issues with improper installation and enjoy the full benefits of a well-cooled CPU.
Remember to be attentive to detail during the process, and your CPU will thank you with improved performance and reliability. Happy cooling!


